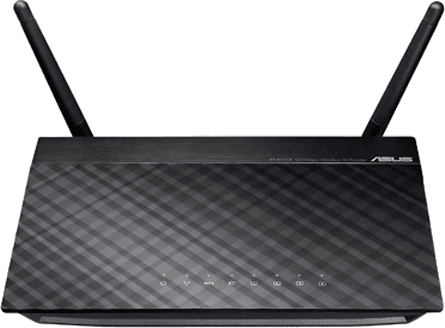
Enable Telnet on the ASUS RT-N12E/LX router

How to, in the original firmware, on the router Asus RT-N12E/LX, enable the Telnet access protocol, even if the firmware is not supported this function.
About the ASUS RT-N12 router
There are two types of ASUS RT-N12 router, “LX” and “E”. The “LX” and “E” versions are the same, but “LX” version have the two antennas, when “E” have only one antenna. I have the Asus RT-N12LX.
This router don’t have alternative firmwares like OpenWRT or DD-WRT, because the chip RTL8192C is too old.
For configuring the router we can try to implement all necessary manipulations from the original firmware, but for this needs access via a command line by SSH or Telnet. On Asus RT-N12E/LX installed firmware version 2.0.* (firmware with “blue” style) which contain the Telnet server. But the Telnet Server is disabled by default and the web interface doesn’t have a trigger to enable it. In the firm documentation of the router, this possibility is not described. So if we can run this server, then we will get access to command line of the router. And … we can!
Enable the Telnet server on the ASUS router
Before enabling the Telnet server you need to login to your router web interface.
1. For this, open your browser and navigate to the default router configuration page. For ASUS, this is either http://192.168.1.1 or router.asus.com.
2. Login using username admin and password admin or what you set before.
3. Then, to enable the Telnet server, go to address:
http://192.168.1.1/telnetd.cgi?enable=1
Now the Telnet server is enabled!
Note: The difference between Telnet and SSH is that telnet sends data in plain text, i.e. it is not encrypted, thus it is unsafe to use Telnet via Internet: packets can be seen by anyone.
Telnet’ing to the router
For connect to the router you can use any Telnet client, for example the PuTTY or a command line client.
Domain, IP-address, username and password is same as in the web admin panel of the router.
- IP-address —
192.168.1.1(or whatever you set). - Domain —
router.asus.com(default for ASUS routers) - Port —
23(default for Telnet protocol). - Username —
admin(default for ASUS routers). - Password is whatever you set (default is
admin).
To use a command line client:
1. Open Terminal App.
2. Connect to the router via Telnet access protocol:
telnet 192.168.1.1
Trying 192.168.1.1...
Connected to 192.168.1.1.
Escape character is '^]'.

# |
Congratulations, now you in the command line of the Linux router ASUS RT-N12E/LX!
Note: Username and password is disabled!
Disable the Telnet server on the ASUS router
After you configured your router you need to disable the Telnet protocol for safe reasons.
1. Log in to your router web interface.
2. To disable the Telnet server go to address:
http://192.168.1.1/telnetd.cgi?enable=0
Note: The Telnet function is auto-disable during reboot.
If this article has helped you then please leave a comment ![]()
Thanks for reading!
Arthur is a designer and full stack software engineer. He is the founder of Space X-Chimp and the blog My Cyber Universe. His personal website can be found at arthurgareginyan.com.


